
Function Introduction
If some content cannot be displayed more perfectly due to the limitation of mobile screen, it can be achieved through the download function. The document types are as follows: txt, doc, docx, xls, xlsx, ppt, zip, rar, pdf, pptx, csv . It can be downloaded directly or forwarded to personal mailbox, which is convenient for users to read the company's relevant product details and case solutions, etc.
Functional advantages
1) Permanent storage
Users can download and store it easily.
2) Accurate transmission
Realize accurate transmission and resource sharing, users can download and print, and study at any time. (Especially suitable for training and learning systems)
3) Target attraction
Timely updates and provision of valuable information can attract long-term fans through email, increase click-through rate and dissemination rate
4) Cost savings
Many conditional applications (especially those for government offices) need to be handwritten. After downloading them online, you can print, fill out, and mail them yourself to increase government and personal work efficiency and shorten the application cycle.
Usage Process
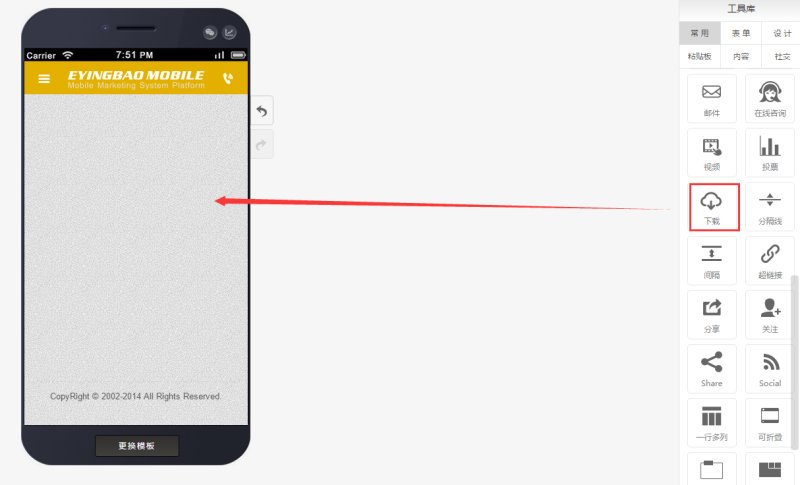
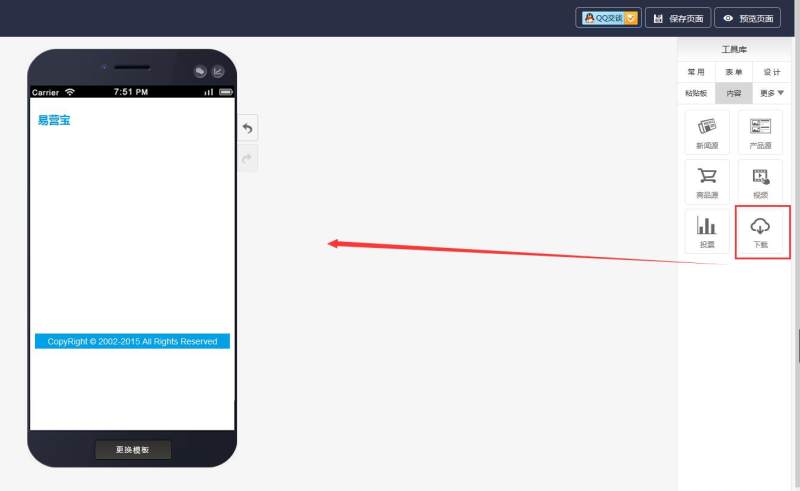
Step 1: In the tool library, select the download control under the content control and drag it to the operation area, as shown below:
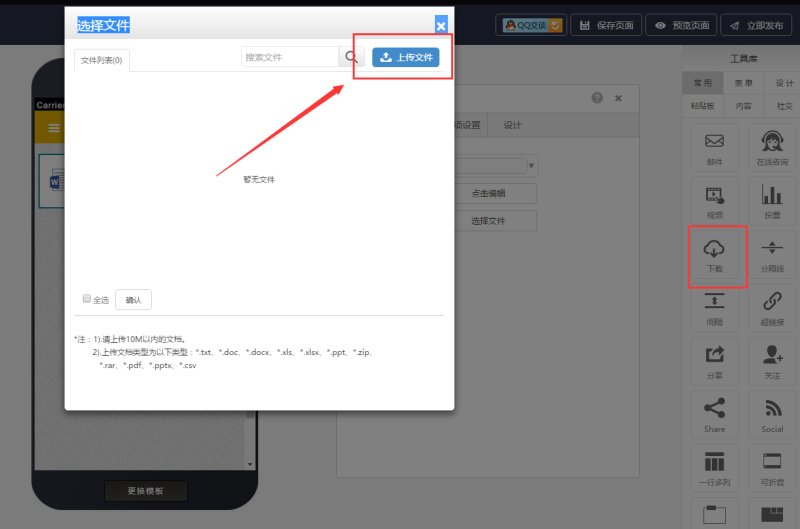
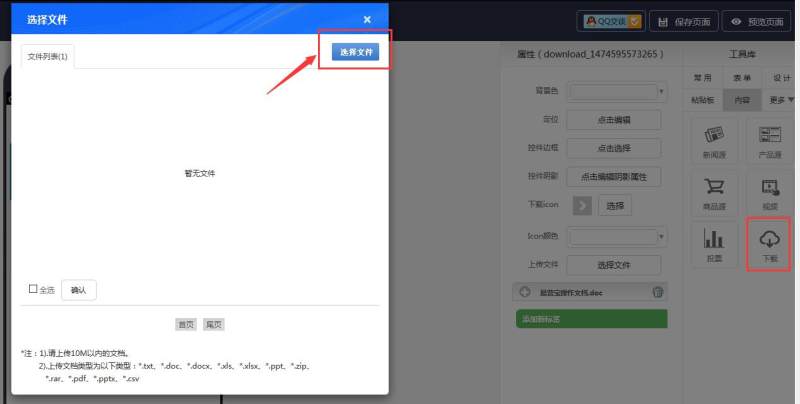
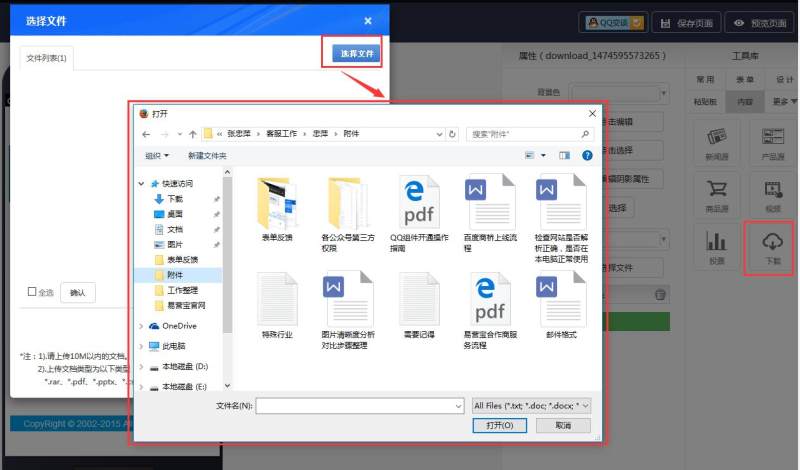
Step 2: The system will automatically pop up a dialog box to select a file. At this time, you need to click "Select File" in the upper right corner of the dialog box as shown below:
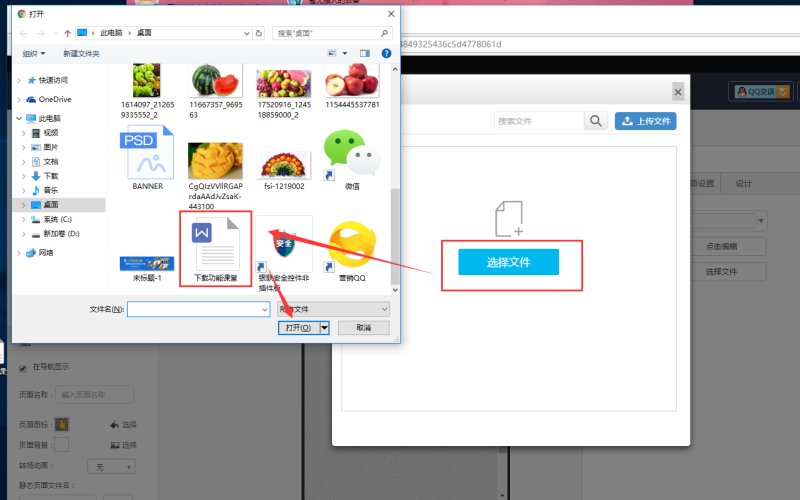
Step 3: Click "Select File" to find the file you need to upload on your computer, and double-click the file or click the Open button below to upload the file, as shown below:
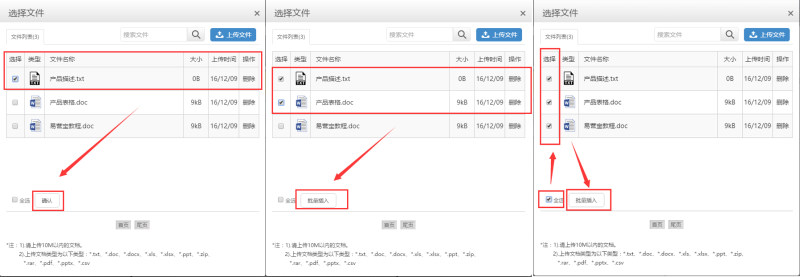
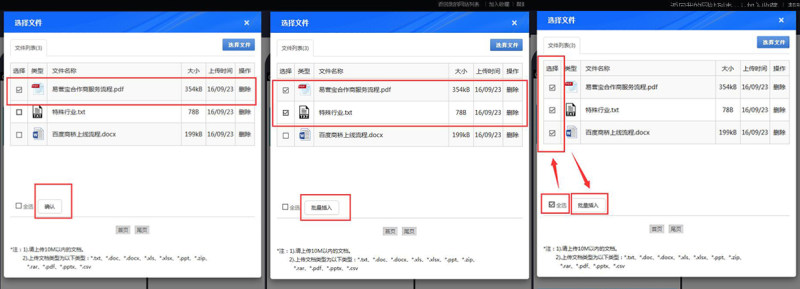
Step 4: After the upload is successful, the file list will be automatically displayed. Click the file you want to upload.
Select a file and select Confirm; select two or more files and select Batch Insert; if all uploaded files are required, click Select All and then select Batch Insert, as shown below:
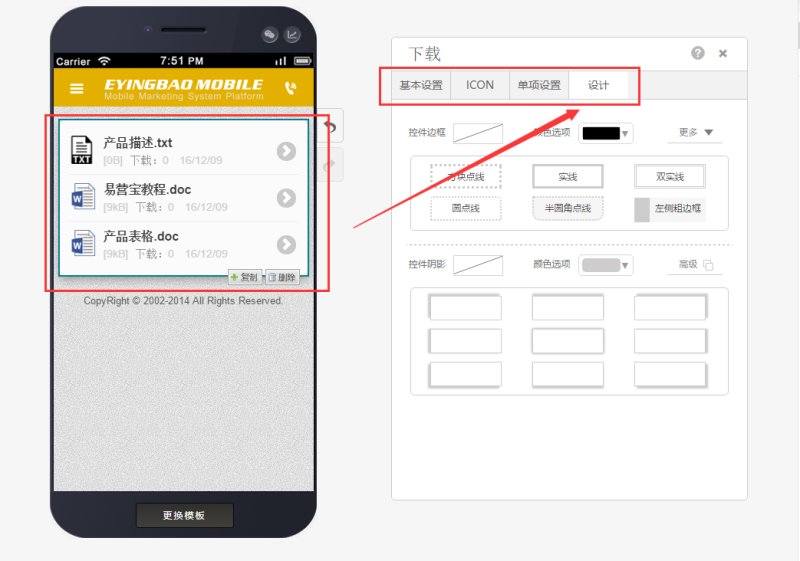
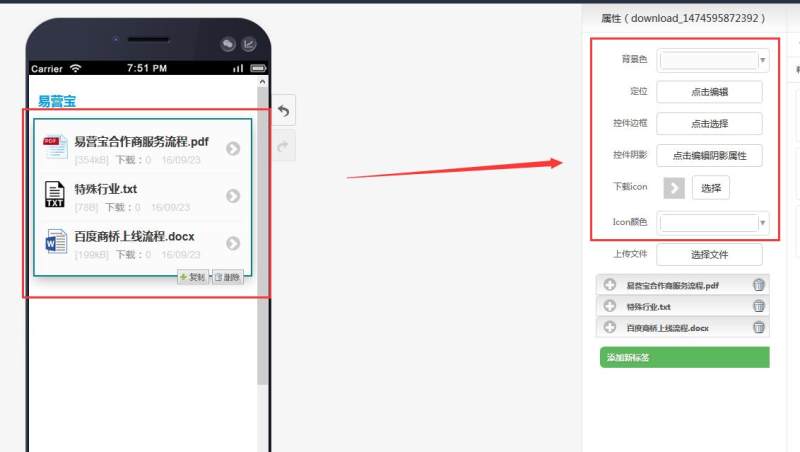
Step 5: Select the download control on the left, and the properties of this control will be displayed on the right. The properties in the red box can be operated and beautified according to your needs, as shown below:
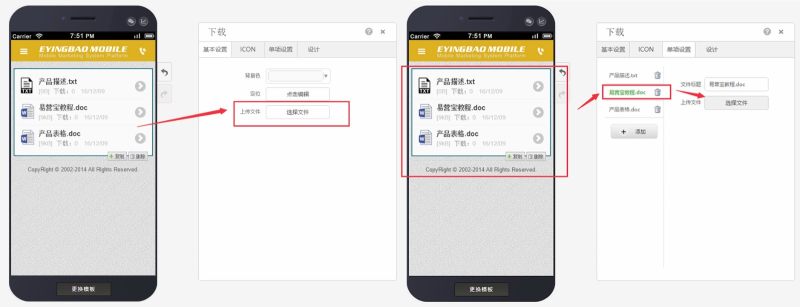
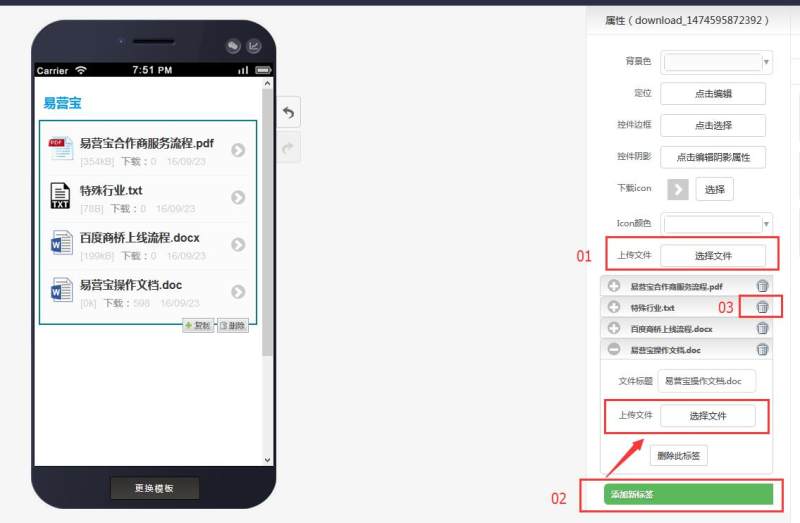
Step 6: If you need to continue to add downloaded files, you can do it in two ways: 01 directly click "Select File", 02 select "Add New Tag", then click to expand the newly added tag, select the file to upload
If you need to delete the uploaded file, find the file you want to delete and click the delete icon at 03 to delete it, as shown below:
Online Inquiry
